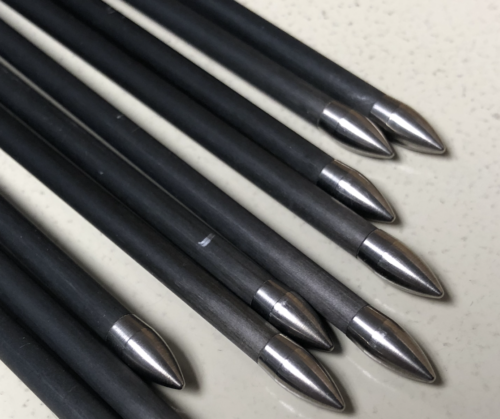
by George Tekmitchov, Easton Sr. Engineer/Target Archery Product Manager
We have reached a part of the season when the target arrows we put together in the late winter or early springtime are now, for most of us, well-used. After many thousands of shots, any flaws in the point installation process will start to become more evident, so many of our arrows may need some maintenance to perform well.
You can easily detect loose components by simply dropping your arrow shafts onto a carpeted surface and listening for a “buzz” or rattle. A shaft with well-bonded components will produce a ringing noise, but loose points will present a buzz or rattle.
Precision points and shafts are not inexpensive and losing points- particularly tungsten points- can be costly, not just for you, but for fellow archers who “find” your points in the buttress through an arrow impact later on.
Here are some general rules for point installation:
- Use Easton hot melt glue. Seriously there is nothing better. Not the hot melt from the hobby shop down the street, not the latest “green miracle glue”. Easton sells a 25 cm stick of this hot melt called a “shop stick”. (The part number is 363345. Have your pro shop order you one, cut it down to size, and share a few pieces with your friends.)
- For melting hot melt, use a butane, or propane torch, or at least an alcohol lamp. Even a kitchen gas burner will do. A clean blue (or as with an alcohol lamp, clear) flame is needed. DO NOT use a candle, a Zippo lighter, a Bic butane lighter, or other yellow flame source. These create soot that will contaminate and weaken the glue joint.
- Only cut shafts with a properly set up, purpose-made arrow cut off saw with a thin abrasive wheel. Rotary pipe cutters, hacksaws and the like are the worst possible way to do the job. You want a clean and even cut with minimal run-out.
- After cutting, clean the inside of the shafts where the point shank will make contact. Pluck cotton off a cotton bud to make it fit, or use pipe cleaners, but do what it takes to remove the dust left behind by cutting the arrow shaft. Don’t go overboard with this, cleaning the point engagement zone is enough. Use Isopropyl alcohol as a cleaning agent. Don’t use acetone or other solvents, especially if the arrow is already fitted with a nock. The fumes can weaken the nock and cause a dry-fire.
- Clean the components themselves. Machined and packaged points are usually pretty clean, but they can be exposed to small amounts of lubricant from the machines used to package them, and the packaging materials themselves often have mold release agents which can get onto the parts. A typical plastic bag often has a surprising amount of these substances.
- Prep the shaft. A LIGHT chamfer on the inside surface of the cut tube promotes a “glue bead” to be pushed ahead of the point shank, rather than a scraping action when the glue-laden point is inserted in the shaft.
- Put a bit of glue inside the shaft. Melt a bit of the glue stick and put a small ring of glue 360 degrees inside the shaft. This will end up being pushed ahead of the point insert and prevent “dry spots” that can cause a glue bond to peel and fail.
- Carefully melt a bit of the glue stick and apply a thin, even layer of glue to the entire surface of the shank.
- While still holding the point head in your fingers re-melt this glue film on the shank by carefully passing it through the flame, fairly quickly. If the point becomes too hot to hold, put it down on a non-stick surface to cool off and try again later.
- While the glue is still molten, twist the point into the shaft until it completely seats against the end of the shaft.
- Immediately, while the glue is still soft, wipe off excess glue with a paper towel. Any excess can be cleaned off with MEK, isopropyl alcohol, or acetone. NEVER USE THESE SUBSTANCES ANYWHERE NEAR AN OPEN FLAME.
- Allow the points to air-cool in a point-down position. DO NOT plunge the points in cold water.
Removing points
Grasp the arrow shaft with bare fingers about 2 cm behind the point.
- Slowly and gradually, heat the POINT ONLY using the same type of flame used for installation. Don’t let the shaft come in contact with the flame.
- When you feel the shaft start to warm under your fingers, stop applying heat. Wait a few more seconds and, with a pair of pliers, try to rotate the point.
- Carefully keep heating and pulling the point until it comes free. DO NOT heat the point so much that you cannot touch the shaft.
Done properly these methods help ensure you will not lose points- either out of your arrow shafts… or on your scorecards!


