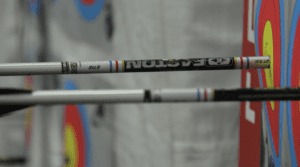
Easton’s new RX-7 arrow shafts are proving to be one of the most popular and accurate new indoor arrows in history- both recurve and compound shooters are seeing great results, because it allows using the biggest possible arrow (within World Archery maximum diameter regulations) while still getting a perfect tune with a lighter point.
The custom, precision rear taper is more forgiving for finger release as well, incorporating tail-spine technology from the Olympic winning X10 arrow shaft. The superior performance of the RX-7 was proven in the 2018-19 competition season by some of the the top archers in the world, like Team USA’s Brady Ellison and Jack Williams.
RX-7 shafts are available in three spine values- 525, 475, and 420- in a 21, 22, and maximum World Archery legal 23 diameter, spanning recurve bow weights up to 52# and draw lengths from 23 to 32.5”.
Until now, many shooters seeking maximum diameter arrows often needed to compromise the bow tune, and potentially compromise forgiveness, by using super-heavy points, leading to greater error potential with slight natural release inconsistencies.
By using a normal 100-125 grain weight point, and the precision flexible rear taper with a weight-forward design, RX-7 series shafts provide the ultimate in finger release forgiveness.
RX-7 also features maximum strength 7178-T9 alloy to ensure durability with tough European target materials
The RX-7-23 has a spine of 0.420, compared to a spine of 0.342 for the equivalent Easton X23 2315 shaft. As an example, this allows the RX-7 23-420 to be tuned with an Easton 2315 one-piece point, at a normal shaft length. Compare this to the X23 2315, which is often tuned by recurve shooters with a heavy, 200 or 300 grain aftermarket point, at a longer than normal shaft length. Extra-heavy points actually make a clean release more critical, due to the increased inertia at the front of the shaft.
The RX-7-22 uses any Easton 2214 point, while the RX-7-21 takes any Easton 2114 point. These same sizes also can be used to select the rear nock UNI-bushing or certain Beiter insert nocks.
Tuning the RX-7 is otherwise similar to tuning a normal, parallel shaft, but with a lighter point- and, extensive testing shows that using a normal weight range point instead of an excessively heavy 200 or 300 grain point is more forgiving for finger release. That means fewer flyers, and higher scores.
Step by Step Tuning Process
- First, follow the recommended sizes shown in the latest Easton arrow shaft selector chart to make your size selection. Start with the one piece point in either 100 or 125 grain weight.
- Use the bare shaft tuning process to dial in the final tune.
Remember, follow the steps in order, and only adjust one variable at a time
Centershot and pressure point
Align the “tip” of the arrow point 1/16” to 1/8” (1 .6 – 3 .2 mm) or less outside the bowstring with the bowstring properly centered . The arrow tip is placed slightly outside the string to provide compensation for the amount the cushion plunger compresses into the bow when the arrow is released .
With a finger release, the arrow bends horizontally, first bending in toward the bow, then bending away from the bow, which causes the arrow shaft to leave the arrow rest. In the next bending sequence, the arrow nock disengages from the bowstring. The arrow is then on its way, freely oscillating all the way to the target. The amount of oscillation decreases as the arrow travels farther from the bow.
Many flipper rest setups have an adjustable arm for the arrow rest. If this adjustment is available on the rest you’re using, the arrow rest support arm should be adjusted so that it is not extending past the outside of the arrow shaft when observed from an overhead view.
For clicker shooters, be sure that the arrow is well supported on the rest and not held in place by the tension of the clicker only. Draw the bow a few times without the clicker to make sure the arrow can be drawn and let down without the arrow falling off the arrow rest.
If your setup incorporates a cushion plunger, start with the spring tension set at medium.
Set brace height according to the recommendations of your bow manufacturer.
Nocking Point
The nocking point position is a very important aspect of the tuning process. It is the foundation of the rest of the tune, so it needs to be set as the first step in tuning after centershot.
Initially, set the nocking point to a position about 1/4” above square with the arrow rest. A tool like Easton’s “T” bow square is invaluable to help with this step.
Once you have a basic nocking point location determined, shoot at least three fletched shafts at a distance of 15 to 20 yards (or meters). Then shoot two identically aimed unfletched shafts at the same aim point.
If the unfletched shafts impact above the identically aimed fletched shafts, move the nocking point up on the bowstring until both fletched and unfletched shafts strike at the same elevation.
If the unfletched shafts impact below the identically aimed fletched shafts, move the nocking point down on the bowstring until the unfletched shafts hit at the same elevation or slightly lower than the fletched shafts.
Generally, most accomplished shooters find a nocking point setting that results in a slightly low bare shaft impact to be more forgiving.
After the correct nocking point position is selected, the bare shaft test is then useful for determining if the correct shaft spine has been selected . If the unfletched shafts don’t group with or very near the fletched shafts, then a weaker or stiffer spined shaft (based on where the arrows have impacted) may be needed.
Stiffness determination
Shoot three fletched shafts at a distance of 15 to 20 yards (meters), then shoot two identically-aimed, unfletched shafts. If the unfletched shafts impact left (stiff) of the identically aimed, fletched shafts, (for a right handed archer), either decrease the spring tension on the cushion plunger, increase bow weight slightly (if your bow weight is adjustable), or increase arrow point weight. If the unfletched shafts impact right (weak) of the identically-aimed, fletched shafts, (for a right-handed archer), increase
the spring tension on the cushion plunger, decrease bow weight slightly (if your bow weight is adjustable), or decrease arrow point weight. Your equipment is basically tuned when the bare shafts and fletched shafts impact at the same or near the same location. Many accomplished shooters prefer the bare shaft to show a slightly stiff indication, for example, 1-2″ left of the fletched group for a right-handed shooter.
Clearance
Proper clearance is absolutely essential for optimum grouping, consistency and accuracy. After you have performed the Bare Shaft Planing or Paper Tuning Arrow Test, it is a good idea to check for adequate clearance. To check for clearance, use dry powder foot spray, dry deodorant spray or similar product, applied to the last quarter of the arrow shaft, fletching, arrow rest assembly, and sight window near the arrow rest. Do not disturb the powder sprayed on the arrow and bow while preparing to shoot . The arrow should be shot into a firm target so that it will not penetrate to the fletching. If you are not achieving good arrow clearance, and the arrow fletching and bow make contact, optimum grouping cannot be achieved. By examining the areas where the dry powder spray is scraped off, the nature of any interference can be determined, and the position of the fletching as the arrow leaves the bow can be identified.
Correcting clearance problems
The following procedures can help you correct clearance problems:
- 1 . If the arrow fletching is hitting the arrow rest, try rotating your
arrow nock 1/32 of a turn . Continue rotating the nock in 1/32-
turn increments until clearance is achieved . - 2 . Make sure your arrow rest support arm does not protrude past the outside of the arrow shaft when the arrow is resting on the support arm and is lying against the cushion plunger or pressure point.
- 3 . Choose a lower profile fletching .
Move the cushion plunger or side loading device slightly out from the bow (increase centershot) to help increase clearance if the other tuning modifications have no effect .
Additional considerations
Nock fit
The nock tension (“snap fit”) necessary to separate the nock from the bowstring serving can be important, especially on light draw-weight bows (30 lbs. and under) . Nock tension should be tight enough so the arrow can easily support its own weight when the arrow is hanging vertically on the bowstring (nock against the nocking point) . To check this, hang your arrow vertically from the bowstring, and give the string a sharp tap with your finger on the serving about 1-2” (2 .5-5 cm) from the arrow nock . The arrow should separate from the string . If it does not, the nock is probably too tight. Re-serve the string to accommodate the nock- never try to modify the nock to fit the string.
Fletching
The RX-7 is easy to tune, more forgiving to shoot, and will score more liners than smaller shafts. Pair them up with natural feathers for the ultimate indoor scoring combination!